Ghee can be made in two ways:
1. Milk cream is churned into butter and then the butter is heated at a low flame till the melted butter looks clear and you can see milk solids deposit at the bottom of the pot.
2. Milk cream is cultured with yogurt, then churned into butter and then that cultured butter is used to make ghee as mentioned in point one and this is known as Desi Ghee.
I’ll be giving you the recipe for the second type i.e. DESI GHEE because that’s the best kind you can have. It has all the goodness that I’ve mentioned in Ghee – The golden Elixir. It can be safely consumed by extremely dairy sensitive people. That’s because during the culturing process of cream, lactose is converted into lactic acid which is easily digested by people with lactose intolerance.
Please Don’t be alarmed by the procedure to make it because once you master the art of making ghee (only takes 2 attempts), your lives will be very simple. You might not go back to your refined oils ever again! It might seem like a lengthy process but it’s not that bad, if I can do it, anyone can do it. Also remember GOOD THINGS TAKE TIME and EFFORT.
Back in India my grandmother, mom and aunts skim cream from the top of the slow boiled milk everyday. They then store this in a covered stainless steel container in the freezer. They do this every day for a few days till the container is almost full and then use it for making homemade butter and ghee.
Here in New Zealand, It’s kind of difficult for me to do that but I think I’ll get there soon. So, in the meantime I buy milk cream from a local farm Dreamview Creamery where they treat their cows really well, their cream is out of the world! I usually buy 2L.
Desi Ghee
Equipment
- Heavy bottom pot
- Cake Mixer
- Sieve
- Spoon
- Glass Jar
Ingredients
- 2 L Heavy Cream Fresh from farm if possible
- 2 tbsp Room Temperature Yogurt Preferably old yogurt that's sour now
Instructions
- 1. Put the cream in a heavy bottom pot and warm it up (key is to warm up not heat!). It’ll only take a minute or two to warm it up on a medium flame. Turn the flame off.
2. Culture it by putting in a good amount of ROOM TEMPERATURE natural yogurt (leave on your kitchen bench to let it come to room temperature), stir it so that yogurt mixes nicely and cover it and leave it overnight. If you live in a cold region put it in your hot water cylinder cupboard or else leave it in your oven with just the light on.
3. Next day your cultured cream (yogurt) will be set, ideally you should churn it with an old fashioned wooden churner but since I don’t have it, I use the cake mixer at the lowest setting, lower the speed, better it is because It retains the moisture and the low temperature because of low speed of mixer doesn’t break the fragile fatty acid bonds. PLEASE DO NOT USE A HIGH SPEED MIXER
4. After few minutes you’ll clearly see the butter separated, add ice cold water to it and take butter out of the buttermilk (please keep the buttermilk) and wash it with water a few times, there you have your cultured butter that you can have as it is if you want to. It’s called LACTIC BUTTER in the West.
5. To make ghee, put the lactic butter in a thick-bottomed pot (preferably stainless steel or copper) on the smallest burner. Heat on full flame for 5 minutes till the butter melts, once it starts boiling, reduce the flame to the lowest and remove the top frothy layer just once, then let it cook on a low flame till the melted butter starts looking clear and there is a deposit of the milk solids at the bottom of the pot.
6. To Check if ghee is done can be tricky but you’ll become an expert once you start making it regularly. If not sure, add 3–4 drops of water when the ghee is boiling. If it sizzles and splutters, it means the ghee is ready.
7. Switch off the heat, add a pinch of salt and few cumin seeds to it and allow it to cool from hot to warm.
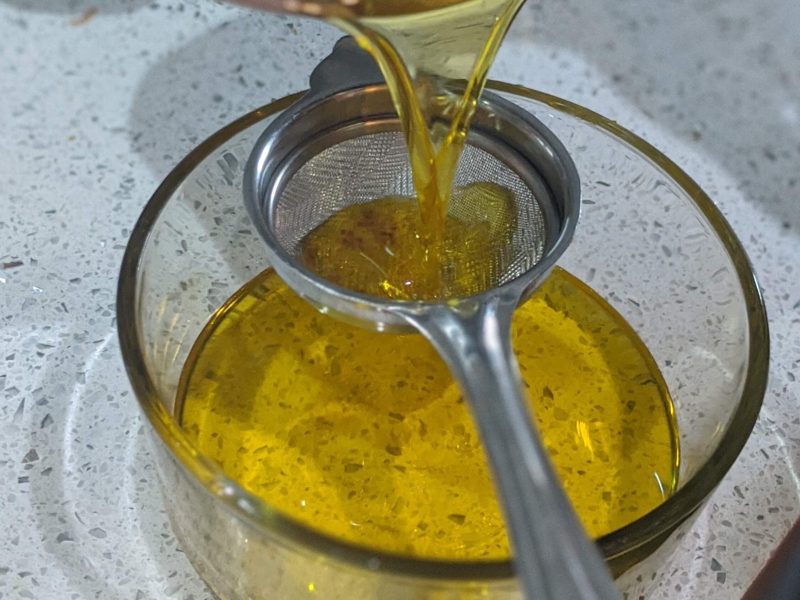
8. While warm sieve the Ghee and store in a closed glass, stainless steel, ceramic or bamboo container (PLEASE STAY AWAY FROM PLASTIC)9. The perfect ghee when cooled is light yellow in colour and grainy in texture. If on cooling, it’s smooth, it means it’s undercooked, and if it’s brown and granular, it’s overcooked. If the ghee is undercooked, you can boil it once again and cook it further.
There you go, your fresh aromatic ghee (remember to smell it) is ready and good to use for 3 months. My ghee lasts only 3 weeks though! Haha






 Shop, Eat, Enjoy Local
