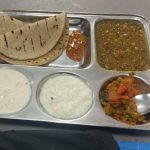
Roti/Chapatti/ Phulka is the most basic and highly nutritious Indian flat bread which is made in almost in every household in every part of India. I belong to Punjab and in my household, we have it at least 2 times a day with daal (lentils, legumes), Sabzi (Dry vegetables cooked in spices) or curry (e.g. Chicken curry, egg curry, paneer etc.).
This flat bread is made from whole wheat flour and water. Whole wheat flour gives roti the goodness of whole grains which are very important for all of us. Some people prefer to add a tablespoon of ghee and some salt while making the dough. I, myself don’t add these for making roti but I do it if I’m making some other speciality flatbreads like poori, naan or bhatura.
The flour used for making Rotis is very finely ground. Mostly durum wheat is used for this. This roti flour is called Atta. I use the NZ made Champions flour Chapatti flour. I use it because it’s an NZ product (Locally sourced)
If someone says Roti, Phulka or Chapatti, just know that they are all one and the same thing. They are just called by different names in different regions of India. It can be of different sizes and thickness based on your preference. I like to make them of medium thickness because it stays soft for longer. The size of my rotis is medium as well. Whereas my mother-in-law like to have them smaller and thinner.
Below is a recipe for the basic flatbread that we Indians eat on a day to day basis. For us it’s equivalent to bread.
Ingredients
Equipment
Method
- Sieve 3 cups of whole wheat flour/ atta in a bowl (preferably stainless steel or glass). If you want to, add ½ teaspoon of salt and 1 table spoon ghee in it and give a good mix. (I don’t usually do this)
- Start adding water and begin to mix the flour to make it into a dough. Continue adding water as required to make into a dough that’snot too hard and not too soft. Practice makes things better
- Knead the dough for 2-3 minutes and keep the dough aside for 10-15 minutes. (Listen to your favourite songs in the meantime!) After 10-15 minutes, knead the dough for a couple more times, the dough should be nice and soft like the cloud.
- Drizzle a bit of oil on top of it and just spread it on the whole dough (this will prevent from the dough sticking to your hands).
- Turn on the stove and place your pan/tawa/griddle on high flame to heat it up.
- Now, take enough dough in that will make a medium sized ball. Roll the ball in your palms to make smooth.
- Flatten this ball, sprinkle some flour from the extra cup of flour that you have kept aside. Start rolling this into a flat circle. (Don’t worry if it’s not a perfect circle, trust me I’ve myself made many country maps while rolling a roti! Haha)
- Tawa should be nice and hot now, you can test it by putting a pinch of flour on it. If it turns brown quickly, it means it’s ready.
- Cook one side and after about 15-20 seconds, turn it over and cook the other side. The first side at this point is about half cooked.
- After about 20-22 more seconds, hold the roti with tongs and put the first cooked side which is half cooked, on the flame. The roti will puff up. Turn and keep the other side on fire.
- If you are not confident doing it on flame, it can be cooked on the griddle itself. I have noticed that cooking on the riddle keeps them softer for longer.
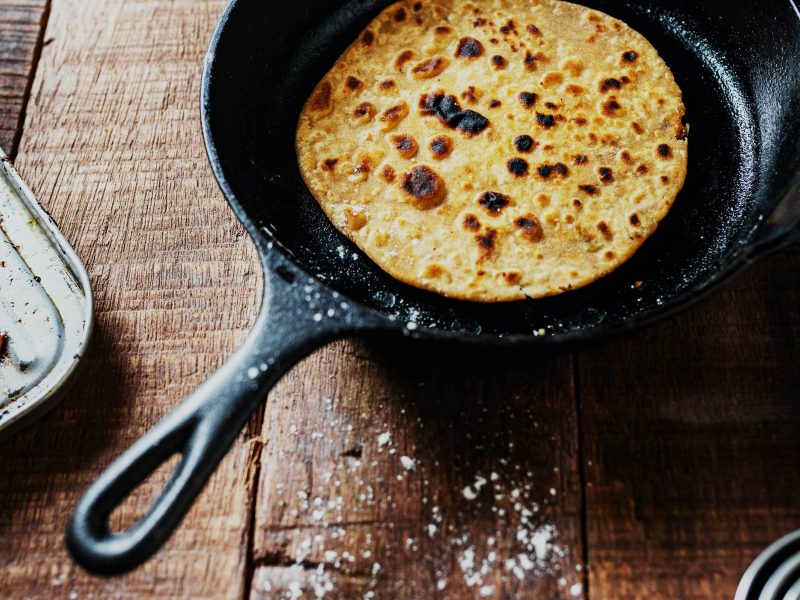
- (Avoid burning the roti otherwise it will become hard). You will see brown spots on both sides. This means your roti is cooked. Take it off the flame and apply some ghee on it.
- Serve hot with a curry/daal /sabzi or even with soup.
Notes
- If you are not going to serve the roti hot, and if you are not confident with cooking the roti on flame, you can finish it up on the griddle instead. Simply use a tea-towel to press the roti gently for it to puff up.
- If you can leave the dough for longer than 15 minutes, that’ll be even better as it’ll make the dough of much better quality and easier to work with. I usually make my dough at the very start of cooking and once the dough it done, I leave it to rest while I cook my curry/daal. I cook my rotis at the end and by that time, the dough is simply perfect!
- For gluten free options – you can use gluten free flour i.e. Rice Flour. This can be hard sometimes to work with, in that case, add some besan (chickpea flour) to bind the gluten free flour together. Chickpea flour is gluten free too.
- It’s better to just make enough dough for a day but if you think you can’t do it every day, you can make dough enough for 2 days in the fridge. Dough kept any longer than 2 days starts oxidizing which is not good for your body as it can cause cell oxidation.
- If you would like to make bulk Rotis at once and freeze them, you could do so, but remember fresh is the best! Just make sure that you semi cook them on both the sides (10-12 seconds each side) and then place a baking paper in between two rotis and then freeze them. That way they can be separated from each other easily to cook when you want to. When cooking frozen roti, don’t thaw it, put it straight on a warm-hot griddle.


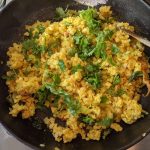
 Poha
Poha